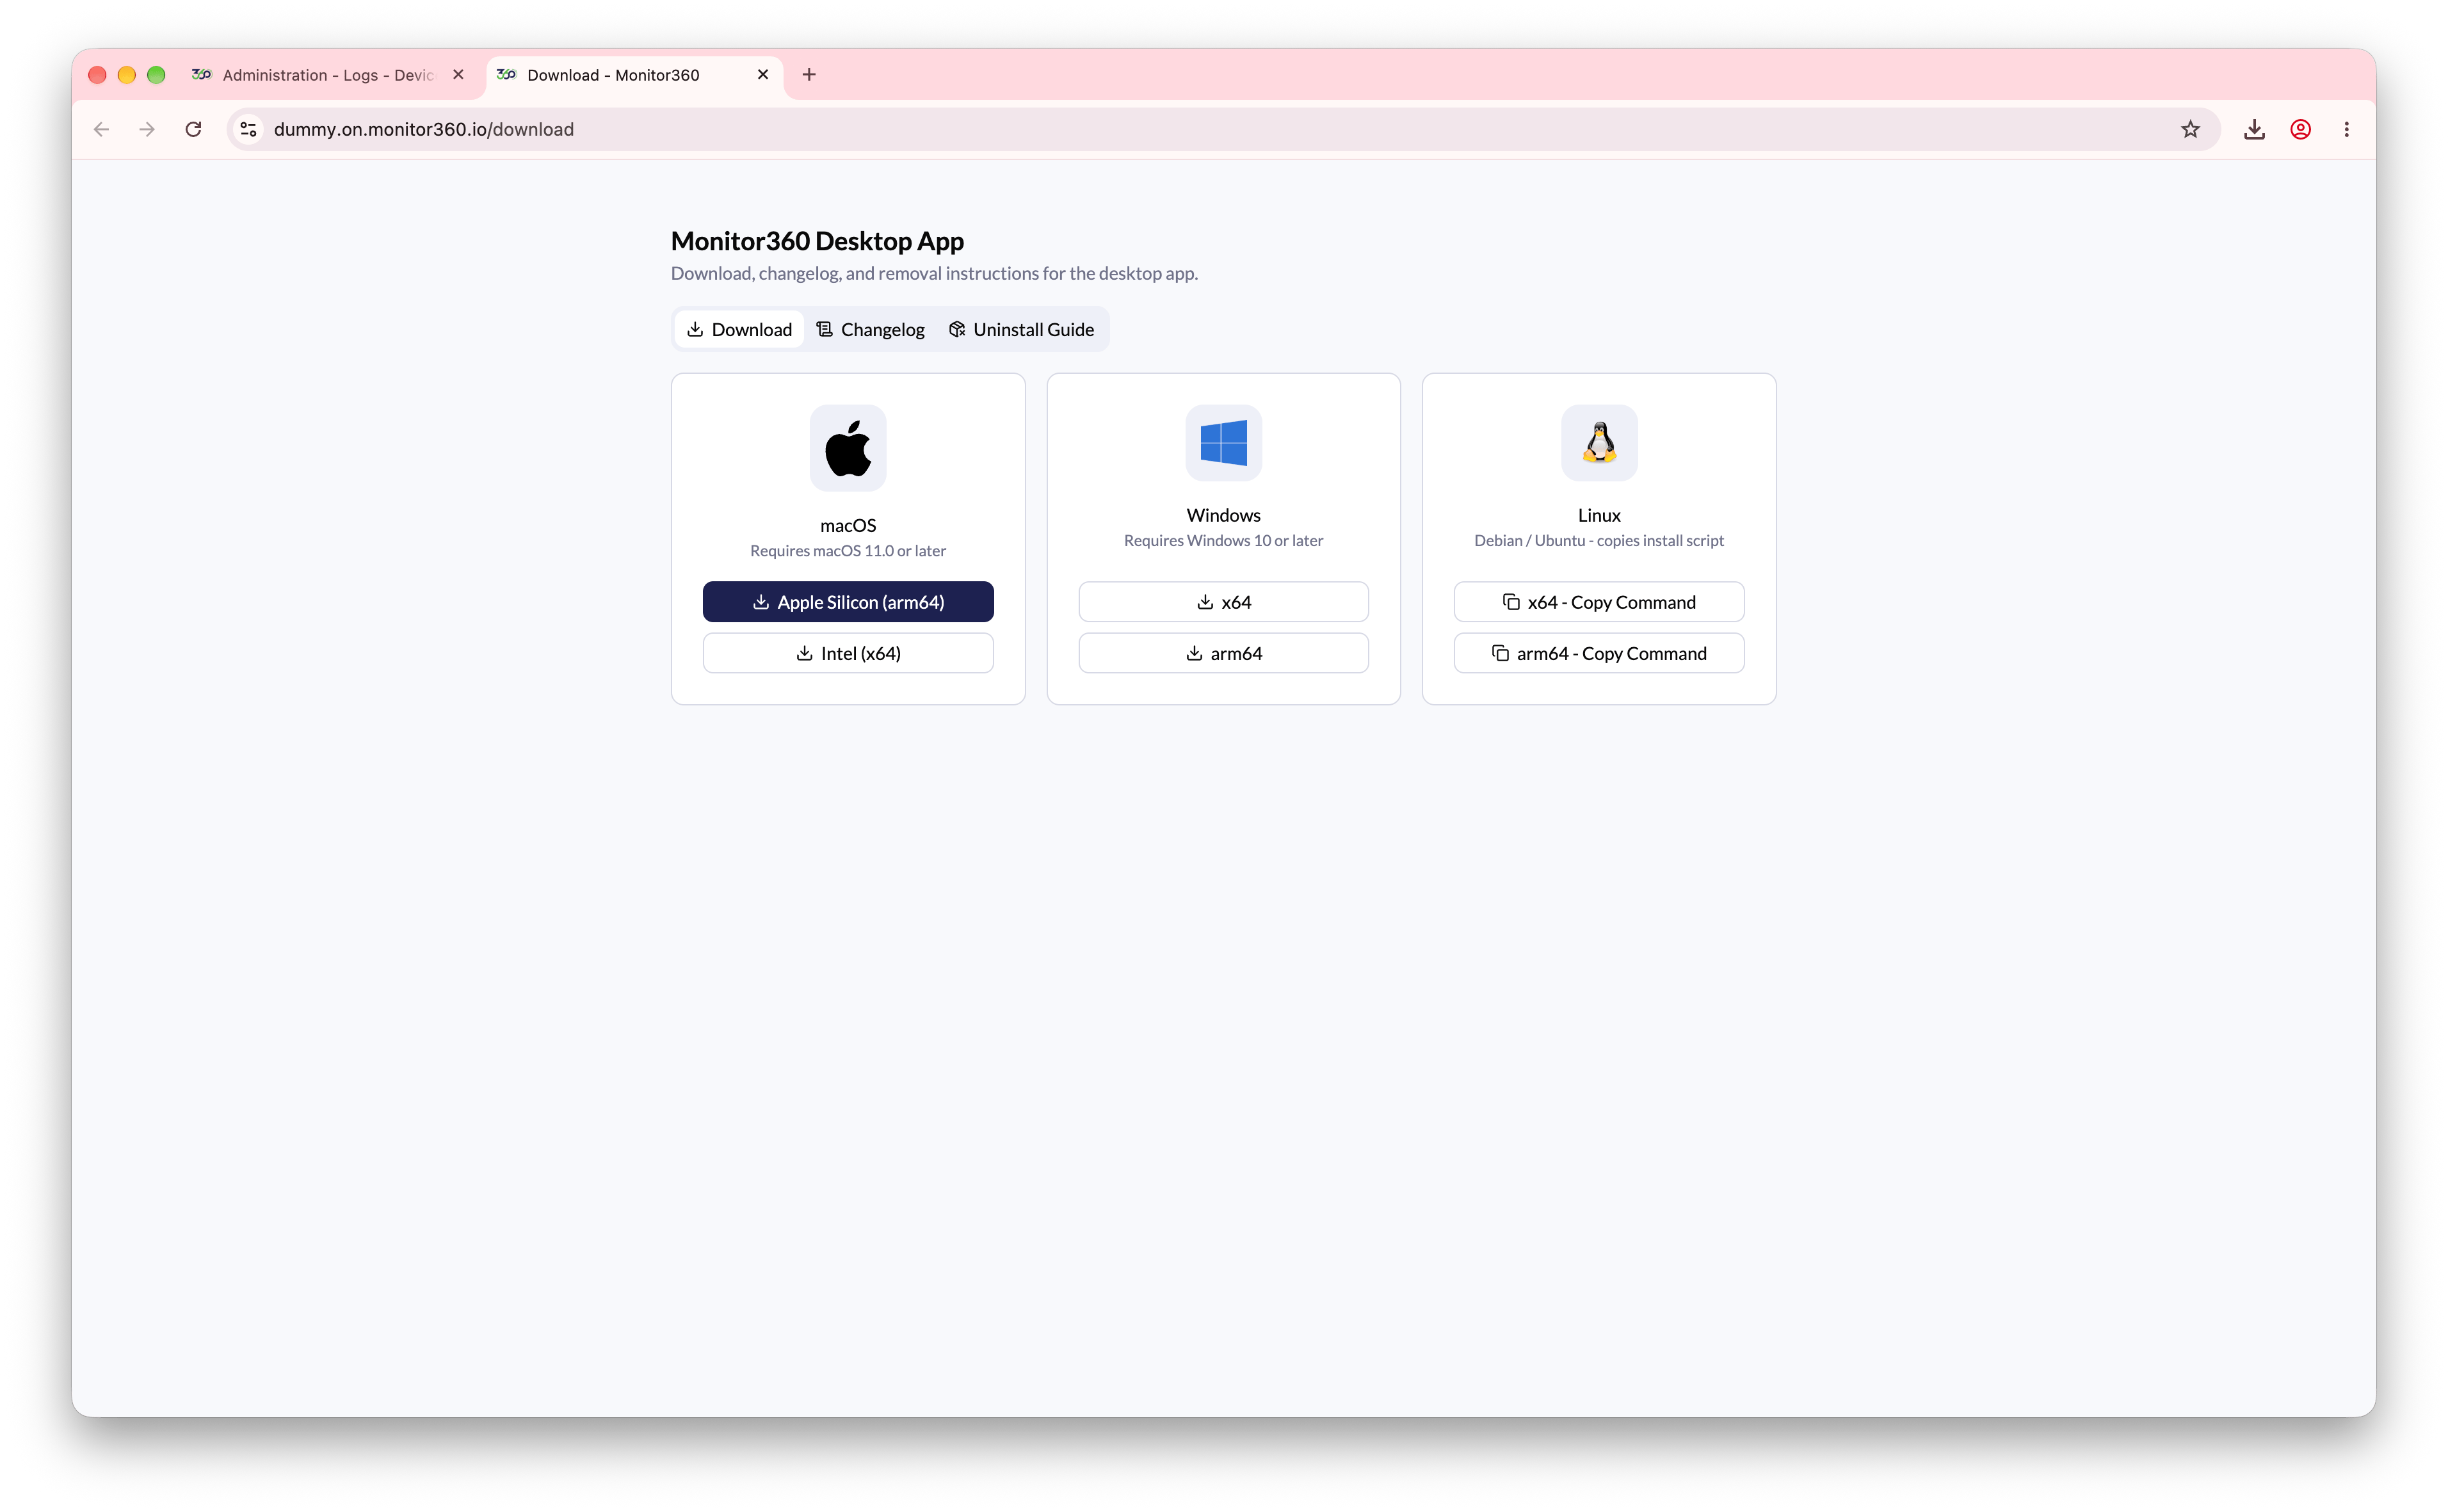
Step 1: Download the Monitor360 Desktop Application
- Open the Monitor360 download page.
- Select the appropriate version based on your operating system:
- Apple Silicon (arm64) - for M1, M2, M3, and newer Macs
- Intel (x64) - for Intel-based Macs
- x64 - for standard 64-bit Windows systems
- arm64 - for ARM-based Windows devices
- Copy the installation command for either x64 or arm64 and run it in the terminal.
Step 2: Grant Required Permissions
After installing the Monitor360 Desktop App, open the application. A permission window will appear. Allow all required permissions to ensure the application functions correctly. Once the permissions are granted, click Check Again to proceed.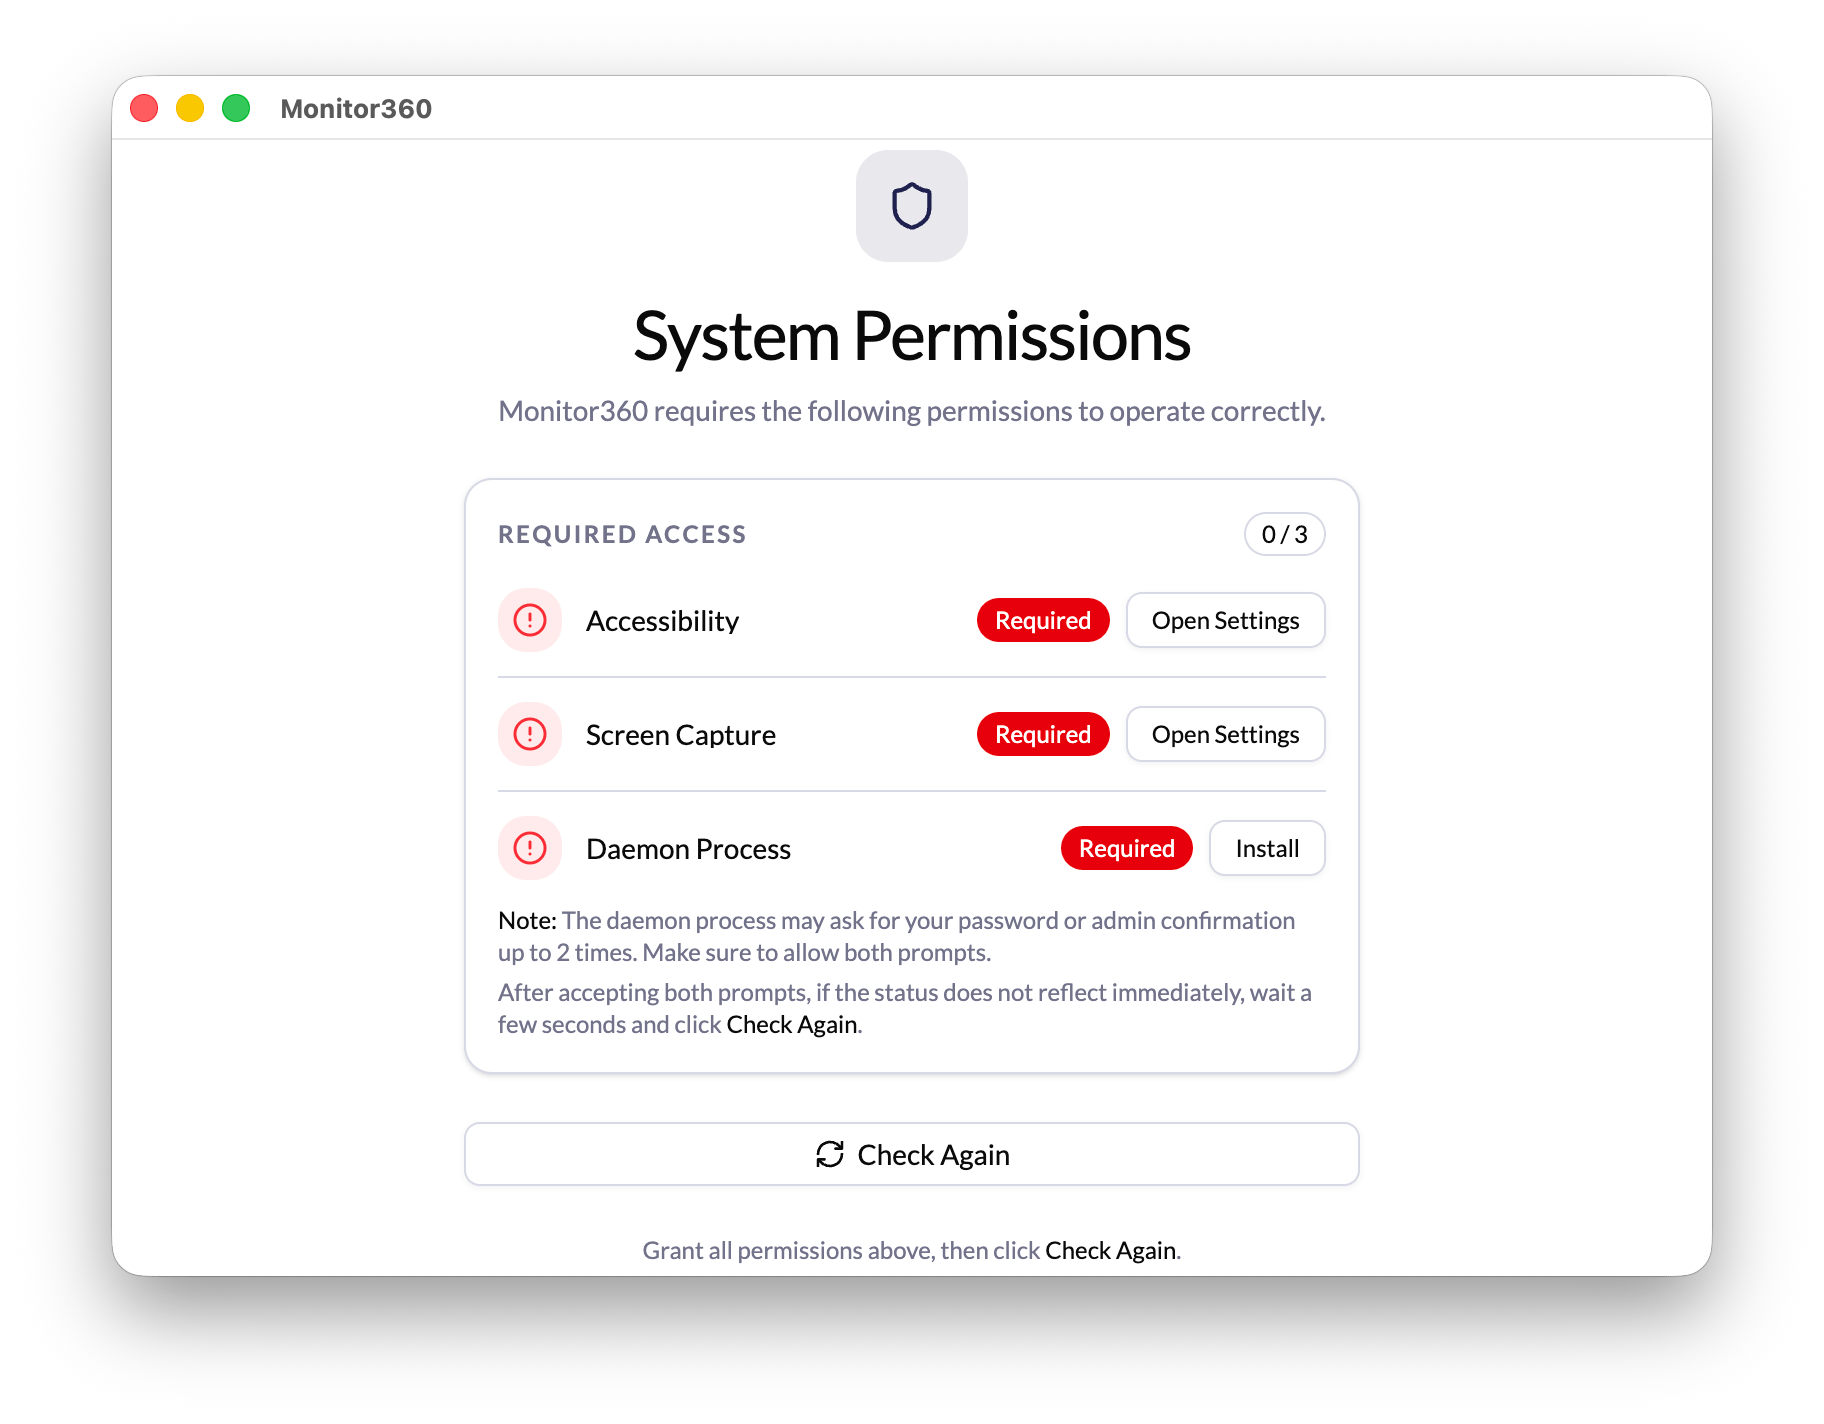
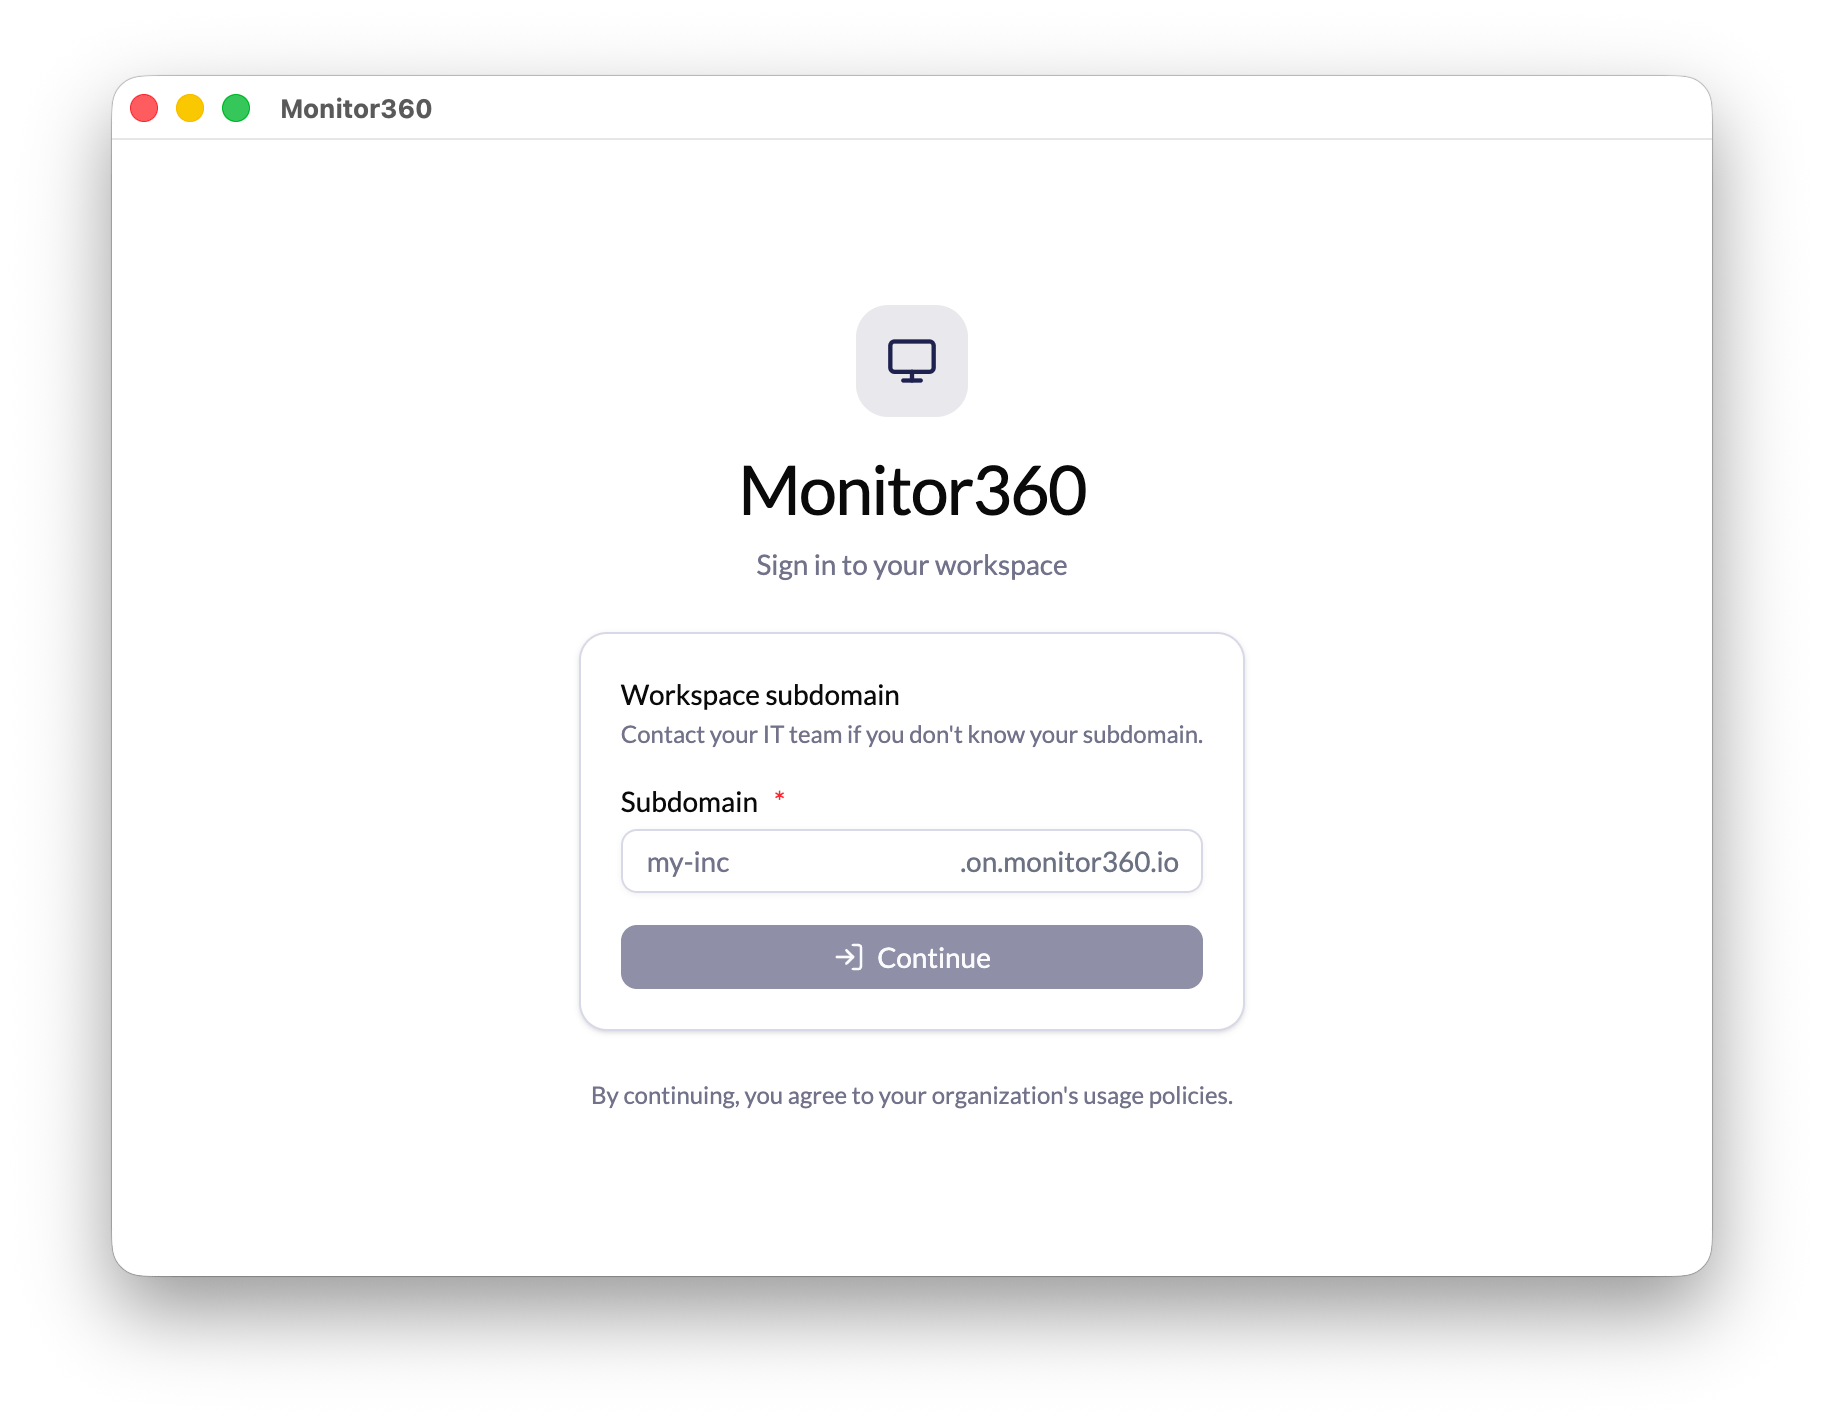
Step 3: Enter Workspace Subdomain
Open the Monitor360 application and enter your assigned Workspace Subdomain (e.g.,my-inc) in the Subdomain field. Then click Continue to proceed.
Contact your administrator if you do not know your workspace subdomain.
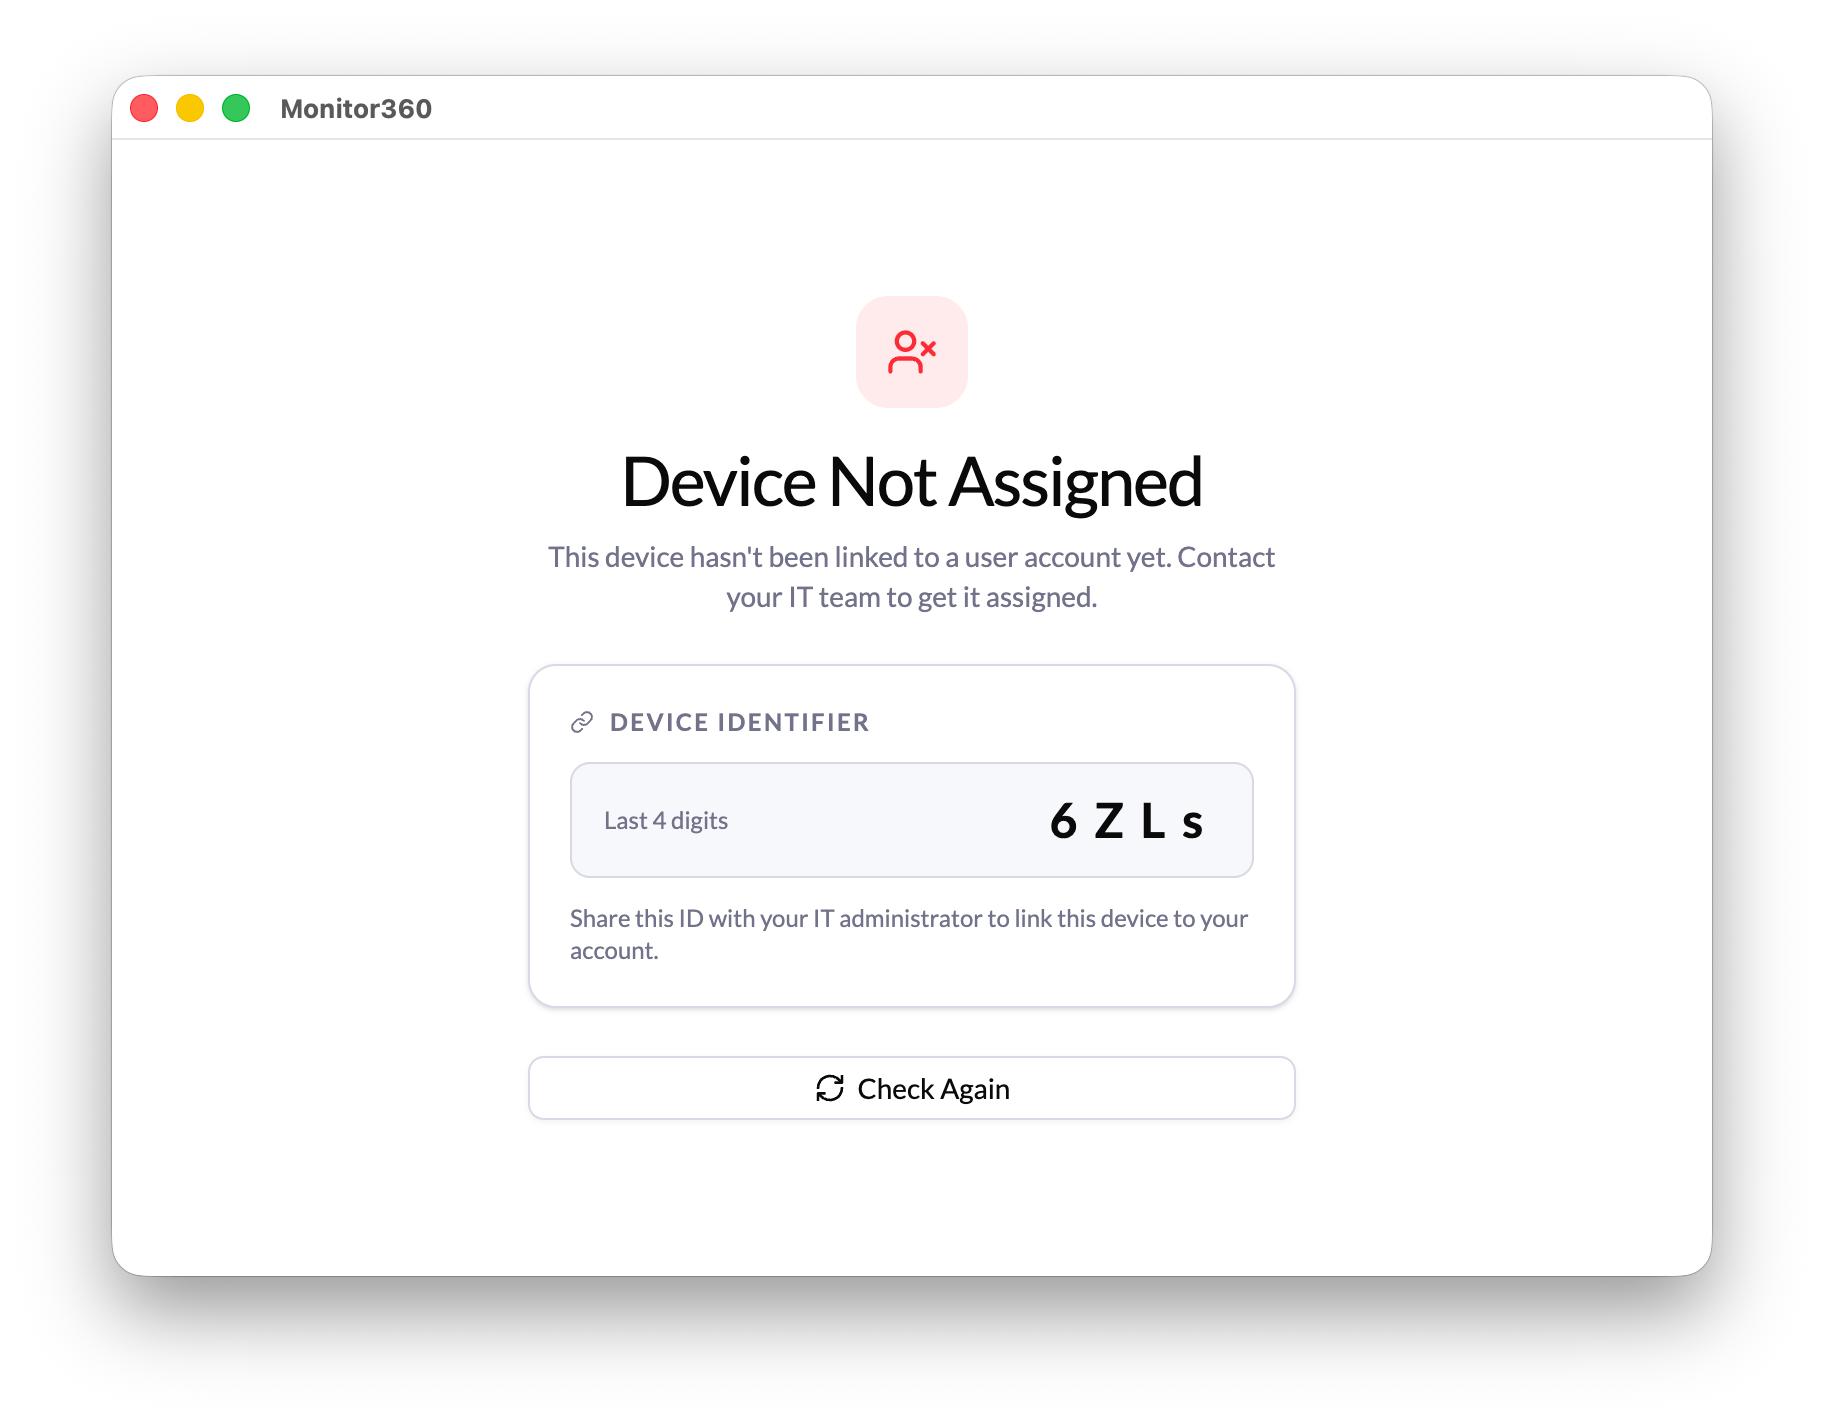
Step 4: Share the Device Identifier
A Device Identifier (4-digit code) will be displayed. Share this code with your administrator so they can link the device to your user account. After the device has been assigned, click Check Again to continue.